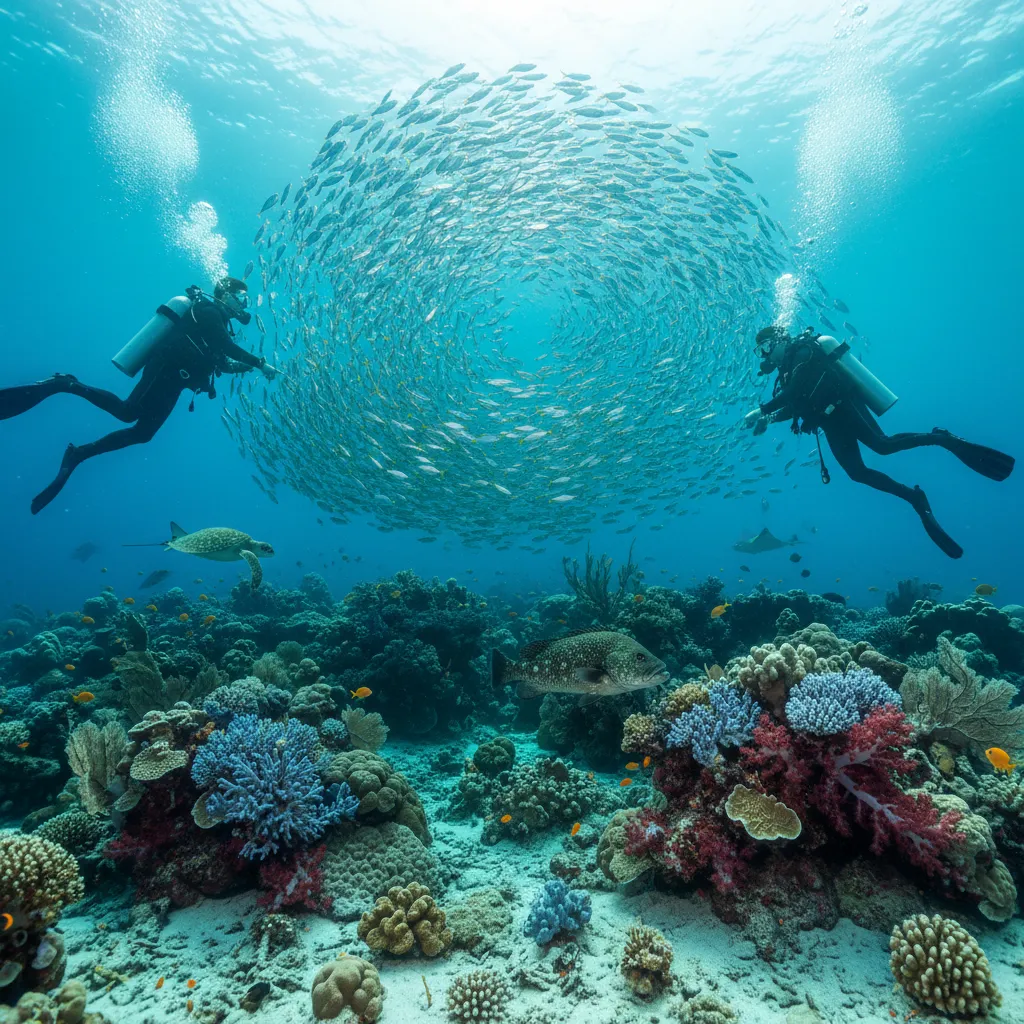
Diving in Sodwana Bay
Why dive here
Sodwana Bay offers some of South Africa's richest diving, with 558+ marine species recorded in the area - including barracuda, blacktip reef sharks, blue sharks, blue-spotted stingrays and bull sharks. Water sits around 28°C.
Sodwana Bay is a standout, no question. We’ve logged countless dives here and it always delivers something new. Think subtropical reef diving, proper Indian Ocean stuff, inside a UNESCO World Heritage site, the iSimangaliso Wetland Park. You get deep pinnacles, surprising caves, and some genuinely healthy reefs, all reachable via bouncy RIB rides from the beach. What makes Sodwana special? The sheer volume of fish. It’s not just big stuff, though you get your share of sharks and emperor fish. It’s the constant schooling activity - fusiliers, trevallies, even those quirky Popeye Lanternfish on a night dive if you know where to look. The reefs themselves are full of intricate details, like tiny Bandcheek wrasse flitting between anemones and surprisingly robust corals, some of them ancient. Conditions can vary. In summer, we often see visibility pushing 20 metres or more, and the water is bath-warm. Winter brings slightly cooler water but often calmer seas, and sometimes, the visibility is just phenomenal. Currents can pick up, particularly on the deeper sites like Nine-Mile, so we always brief thoroughly. Our favourite sites are usually Stringer and Ribbon, especially early morning before the crowds. Definitely worth the drive, a proper South African dive adventure.
Sodwana Bay Dive Site Map
Dive sites and dive centres in Sodwana Bay
Sodwana Bay Dive Sites
79 dive sites in Sodwana Bay
2 Mile Reef
2 Mile Reef gives you a good cross-section of Sodwana's coral diving. Expect to find plenty of reef fish, often in decent schools, along with the occasional pelagic passing through. It's a busy site, so don't expect solitude, but the sheer volume of activity makes it a good option for newer divers getting comfortable with reef environments. We find it’s a reliable spot for a solid dive when the bigger stuff isn't around.
2 Mile Reef Pinnacles
The Pinnacles at 2 Mile Reef feel like a secret garden, even if everyone knows about them. We love a shallow dive where you can just drift and really *look*. This whole area is a maze of coral towers, some rising to within six metres of the surface. Our favourite, the "Old Woman Pinnacle," is a proper landmark, a really substantial piece of reef covered in blueskin and goldies, with bannerfish always hanging around its edges. You’ll want to take your time here, maybe do a slower kick cycle, because the real magic is in the cracks and crevices. We’ve found peacock mantis shrimp here, their eyes always twitching, and spotted hawkfish perched on top of stony corals, ready to dart into the shade. Look out for whitetip reef sharks too, often just resting on the sand patches between the pinnacles. It’s an ideal spot for macro fanatics and photographers, or anyone who just wants a relaxed, colourful dive without the pressure of depth. The visibility here is usually great, letting sunlight really drench the corals.
2 Mile Reef Pinnacles
The Pinnacles at 2 Mile Reef feel like a secret garden, even if everyone knows about them. We love a shallow dive where you can just drift and really *look*. This whole area is a maze of coral towers, some rising to within six metres of the surface. Our favourite, the "Old Woman Pinnacle," is a proper landmark, a really substantial piece of reef covered in blueskin and goldies, with bannerfish always hanging around its edges. You’ll want to take your time here, maybe do a slower kick cycle, because the real magic is in the cracks and crevices. We’ve found peacock mantis shrimp here, their eyes always twitching, and spotted hawkfish perched on top of stony corals, ready to dart into the shade. Look out for whitetip reef sharks too, often just resting on the sand patches between the pinnacles. It’s an ideal spot for macro fanatics and photographers, or anyone who just wants a relaxed, colourful dive without the pressure of depth. The visibility here is usually great, letting sunlight really drench the corals.
2 Mile Stringer
Two Mile Stringer, for us, is one of Sodwana's quiet achievers. It's not the grand canyons of Seven Mile, but what it lacks in scale, it makes up for in intimate moments. We love dropping onto those two rocky outcrops, islands in a sea of sand, because you never quite know what’s going to turn up. Last time, we watched a massive round ribbontail ray glide off into the blue, then spent a good 20 minutes with a spitlure frogfish, practically camouflaged against a sponge. This spot is a nursery for good reason. You’ll see schools of juvenile bream and gregory darting through the coral heads, and the pufferfish here are particularly bold. For photographers, especially macro fans, it’s a goldmine. Look closely at the crevices for harlequin shrimp, and keep an eye on the sand for those short-tail stingrays. It’s a shallow dive, rarely pushing past 13 meters, so you get plenty of bottom time, which we always appreciate. We’d suggest hitting it early in the morning, before the current picks up too much. This site offers a more relaxed pace, perfect for divers who prefer to slow down and really observe the smaller, often overlooked, residents of the reef. Expect to find a surprising density of juvenile fish and unique critters, making it an excellent choice for photographers or those wanting a less strenuous exploration.
2 Mile Stringer
Two Mile Stringer, for us, is one of Sodwana's quiet achievers. It's not the grand canyons of Seven Mile, but what it lacks in scale, it makes up for in intimate moments. We love dropping onto those two rocky outcrops, islands in a sea of sand, because you never quite know what’s going to turn up. Last time, we watched a massive round ribbontail ray glide off into the blue, then spent a good 20 minutes with a spitlure frogfish, practically camouflaged against a sponge. This spot is a nursery for good reason. You’ll see schools of juvenile bream and gregory darting through the coral heads, and the pufferfish here are particularly bold. For photographers, especially macro fans, it’s a goldmine. Look closely at the crevices for harlequin shrimp, and keep an eye on the sand for those short-tail stingrays. It’s a shallow dive, rarely pushing past 13 meters, so you get plenty of bottom time, which we always appreciate. We’d suggest hitting it early in the morning, before the current picks up too much. This site offers a more relaxed pace, perfect for divers who prefer to slow down and really observe the smaller, often overlooked, residents of the reef. Expect to find a surprising density of juvenile fish and unique critters, making it an excellent choice for photographers or those wanting a less strenuous exploration.
300
The 300, a non-dangerous wreck resting at 48m, offers a deeper dive experience in Sodwana. It's a structure that draws in various marine life, making it interesting for those keen on wreck exploration and observing resident species. We’d suggest this site for experienced divers comfortable with depth and looking for a slower, more deliberate exploration away from the shallower reefs. Visibility can vary, so check conditions.
3 Mile Reef Hotspots
3 Mile Reef Hotspots is where we send divers looking for that specific Sodwana magic without venturing too deep. We love dropping into a cloud of fusiliers here, often so thick you just hover and watch them swirl. The reef plate itself is a honeycomb of small overhangs and ledges, perfect for hunting out critters. Look for the Gelatinous Cardinalfish lurking in the shadows, or the bright flash of a Candy Cane Wrasse darting across the coral. Our favourite is spotting the Rama Rao's Scorpionfish, they're absolute masters of disguise, melting into the reef texture. You’ll typically find us spending most of our time between 18 and 25 metres here, though it does drop to 32m. It’s a site that rewards slow diving and a keen eye. While it’s not known for big pelagics, we’ve certainly had Common Eagle Rays glide by. Visibility averages around 8 metres, which isn't always fantastic, but it forces you to focus on the intricate details of the reef and the smaller inhabitants, which is where 3 Mile Hotspots really shines.
3 Mile Reef Hotspots
3 Mile Reef Hotspots is where we send divers looking for that specific Sodwana magic without venturing too deep. We love dropping into a cloud of fusiliers here, often so thick you just hover and watch them swirl. The reef plate itself is a honeycomb of small overhangs and ledges, perfect for hunting out critters. Look for the Gelatinous Cardinalfish lurking in the shadows, or the bright flash of a Candy Cane Wrasse darting across the coral. Our favourite is spotting the Rama Rao's Scorpionfish, they're absolute masters of disguise, melting into the reef texture. You’ll typically find us spending most of our time between 18 and 25 metres here, though it does drop to 32m. It’s a site that rewards slow diving and a keen eye. While it’s not known for big pelagics, we’ve certainly had Common Eagle Rays glide by. Visibility averages around 8 metres, which isn't always fantastic, but it forces you to focus on the intricate details of the reef and the smaller inhabitants, which is where 3 Mile Hotspots really shines.
7 Mile Reef
Seven Mile Reef is a solid coral reef dive in Sodwana Bay, known for its consistent healthy hard corals. We often find large potato bass hanging around the reef's many ledges, and the schools of snapper can be impressive. It’s a good choice for divers looking for a reliable South African reef experience, especially those who appreciate reef structure and bigger fish.
7 Miles Reef
Seven Mile Reef is a proper Sodwana staple, and our pick for divers who appreciate a bit of space and some truly impressive coral structures. We’ve always loved the feeling of dropping onto a reef that seems to just stretch out forever, unlike some of the more compact sites further north. You’ll find some seriously big brain corals here, some with intricate folds that make them look like giant, living sculptures. The average depth around 16m makes it a relaxed dive, but the currents can pick up, so it's a site for those comfortable with a negative entry and a bit of drift. Keep an eye out for the big Malabar groupers lurking in the shadows; they’re often spotted alongside the more colourful wrasse and busy shoals of fusiliers. We've had some memorable encounters with silvertip sharks cruising the deeper edges too. It’s a site that rewards a slow pace, letting you really take in the scale of the reef and the constant movement of reef fish like the gorgeous gussies.
7 Miles Reef
Seven Mile Reef is a proper Sodwana staple, and our pick for divers who appreciate a bit of space and some truly impressive coral structures. We’ve always loved the feeling of dropping onto a reef that seems to just stretch out forever, unlike some of the more compact sites further north. You’ll find some seriously big brain corals here, some with intricate folds that make them look like giant, living sculptures. The average depth around 16m makes it a relaxed dive, but the currents can pick up, so it's a site for those comfortable with a negative entry and a bit of drift. Keep an eye out for the big Malabar groupers lurking in the shadows; they’re often spotted alongside the more colourful wrasse and busy shoals of fusiliers. We've had some memorable encounters with silvertip sharks cruising the deeper edges too. It’s a site that rewards a slow pace, letting you really take in the scale of the reef and the constant movement of reef fish like the gorgeous gussies.
9 Mile Coral Tree
Nine Mile Coral Tree, for us, is all about the ambience. It’s got this serene, almost ethereal feel, especially when the current is gentle. We love dropping onto the reef and immediately seeing the resident green tree coral, it’s a stunning landmark. The reef here, topping out at around 20 metres, is a sprawling coral garden where you can really slow down and appreciate the details. On a good day, the visibility stretches past 20 metres, letting the sunlight dapple through the water, making the fusiliers and rainbowfish shimmer. Keep an eye out for honeycomb stingrays cruising over the sandy patches between the coral bommies. We’ve had fantastic encounters with common false morays here, tucked into crevices, their heads poking out with that perpetually grumpy expression. It's a site that rewards patience, perfect for those who enjoy taking their time to spot the smaller stuff like blennies and the surprisingly vibrant flat needlefish. If you're hoping for sailfish or scalloped hammerheads, you’ll need a bit of luck and a watchful eye into the blue, but the reef itself is the main draw.
Show all 79 dive sites in Sodwana Bay
- 9 Mile Coral Tree
- 9 Mile Reef
- Adventure Reef - 2 Mile Reef
- Adventure Reef - 2 Mile Reef
- Amoray
- Anchor
- Anchor
- Antons
- Antons
- Atlantis
- AURORA
- Baix De Naix
- Bass City
- Bikini
- Bikini
- Bread Loaf
- Checkers
- Compass Rocks Sodwana Bay
- Coral Divers
- Coral Gardens
- CRAGNESS
- Crèche
- Deep Sponge - 2 Mile Reef
- EASTWAY
- ENGINEER
- Fingers
- Five Mile Reef
- Four Buoy, Sodwana Bay
- Gordon’s Drop - 5 Mile Reef
- Gotham, Sodwana Bay
- Hopscotch
- Hot Spot
- Island Rock
- Jessor Canyon Cave
- Kevs Ledge
- King Fish Alley
- Komati Springs
- LICUNGO
- Light House Wreck
- Malongane Ledge
- MAPUTO
- Mavericks
- Mellow Yellow, Sodwana Bay
- NEWARK CASTLE
- PILOT VESSEL 120
- Pinnicles Ponta Malongane
- Pisces Diving
- Quarter Mile
- Riana’s Arch
- Ribbon Reef
- Ribbon Reef - 5 Mile
- Roonies
- SHAI (POSSIBLY)
- Shark Point
- Simons Caves and Overhangs
- SNAPPER
- Sodwana Bay - Two Mile Reef
- Sodwana Bay - Two Mile Reef
- Steves Ledge
- TECUMSEH
- Teddy Bears
- TEREDO
- Trenches - 2 Mile Reef
- Two Mile Reef
- Unicorn Reef 2 Mile Reef
- Waynes World
- Wreck of Chaimite
Sodwana Bay Dive Centres
12 dive shops and operators in Sodwana Bay
Coral Divers
Gozo Azul Diving
Malongane Beach Resort
Maputo Dive Center
Mermaids Cove Ei
Occi Scuba
Pisces Diving Charter-Sodwana Bay
Scuba center
Show all 12 dive centres in Sodwana Bay
Ocean Wildlife in Sodwana Bay
558 species recorded in Sodwana Bay
Sodwana Bay Daylight & Sunrise/Sunset
Sunrise and sunset times for Sodwana Bay, calculated from coordinates
Today - Sunday 11 October
Sunrise
05:18
Sunset
17:55
Daylight
12h 36m
Golden Hour
17:24
First light (dawn) at 04:55 · Last light (dusk) at 18:18
Monthly Averages
| Month | Sunrise | Sunset | Daylight |
|---|---|---|---|
| Jan | 05:09 | 18:49 | 13h 40m |
| Feb | 05:34 | 18:35 | 13h 1m |
| Mar | 05:51 | 18:07 | 12h 17m |
| Apr | 06:06 | 17:33 | 11h 27m |
| May | 06:23 | 17:10 | 10h 48m |
| JunShortest | 06:37 | 17:03 | 10h 26m |
| Jul | 06:38 | 17:13 | 10h 35m |
| Aug | 06:20 | 17:29 | 11h 8m |
| Sep | 05:48 | 17:43 | 11h 55m |
| OctNow | 05:14 | 17:57 | 12h 42m |
| Nov | 04:51 | 18:18 | 13h 27m |
| DecLongest | 04:50 | 18:40 | 13h 50m |
Times are approximate local times based on longitude. Actual times may vary slightly depending on the exact timezone observed in Sodwana Bay.
Where to Stay near Sodwana Bay
Prices from Booking.com. We may earn a commission at no extra cost to you.
Marine Protected Areas near Sodwana Bay
6 protected areas near Sodwana Bay - please respect local regulations when diving
iSimangaliso Marine Protected Area
iSimangaliso Wetland Park – Maputo National Park
Turtle Beaches/Coral Reefs of Tongaland
St. Lucia Marine Reserve
Maputaland Marine Reserve
Richards Bay Game Reserve
Getting to Sodwana Bay
Mkuze
Mpaka
Maputo
Plan & book
Ways to dive Sodwana Bay, from day trips to liveaboards.
Day trips & courses
via GetYourGuideGuided dives, courses and snorkel trips with instant booking.
Find dive trips in Sodwana BayPlaces to stay
via Booking.comHotels and dive resorts near Sodwana Bay.
Search stays in Sodwana BayDive insurance
Most travel insurance excludes or limits scuba. Check what you need before you go.
Dive insurance explainedPartner links: we may earn a commission if you book, at no extra cost to you. How we make money