Diving in Goat Island & Hauraki Gulf
Why dive here
Goat Island & Hauraki Gulf offers some of New Zealand's richest diving, with 72+ marine species recorded in the area - including blue sharks, dolphins, hammerhead sharks, humpback whales and seahorses. Water ranges 14-22°C, warmest January, February, March.
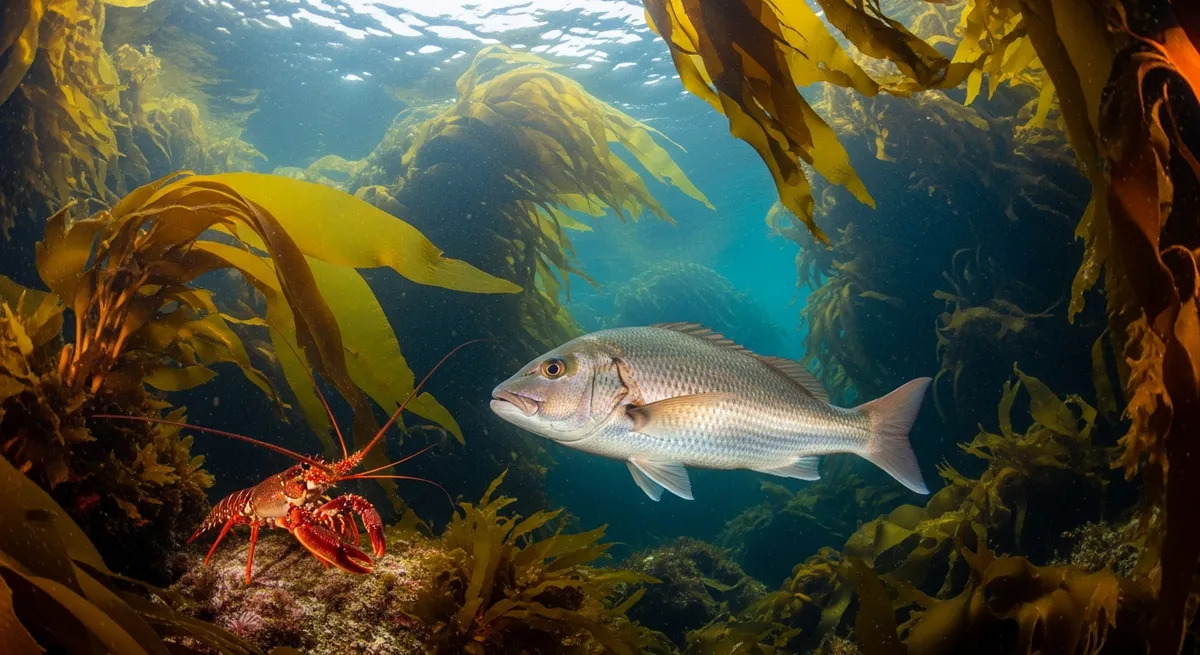
Goat Island, New Zealand's first marine reserve, sits just an hour north of Auckland, and we think it's the perfect spot to get acquainted with the country's underwater world. It's a place where you can genuinely see snapper unafraid, swimming right up to your mask. We love the kelp forests, swaying gently with the surge, creating a moody, green cathedral where banded morwong peek out from the fronds and crayfish sometimes just sit out in the open. Beyond Goat Island itself, the Hauraki Gulf offers a surprising variety of dives. You can explore some fascinating shore dives, but our favourite way to experience the Gulf is by boat, jumping in on a pinnacle dive or exploring a sheltered reef wall. Visibility here can swing, it’s fair to say, anywhere from a milky 5 metres to a crisp 15 metres on a good day, particularly after a few days of settled weather. Keep an eye out for Black Stingrays cruising the sandy patches, and if you’re lucky, you might even spot a Common Diving Petrel darting through the water column, hunting. It’s not about huge pelagics here; it's about getting up close with the temperate reef life and appreciating the local characters.
Goat Island & Hauraki Gulf Dive Site Map
Dive sites and dive centres in Goat Island & Hauraki Gulf
Goat Island & Hauraki Gulf Dive Sites
97 dive sites in Goat Island & Hauraki Gulf
4 mile reef
Four Mile Reef, just off Goat Island, offers a simple, rewarding dive. We like the easy shore entry, gently sloping over sand and stone. You'll drop to about 18 metres, often finding good visibility on the sand flats, though the deeper areas can get a bit silty. It’s a great spot for an easy navigation dive, with plenty of koura tucked into crevices. Keep an eye out for schooling snapper and those ever-present rainbow trout. It’s a low-key site, perfect for a relaxed dive when the easterly winds stay under 8 knots.
4 mile reef
Four Mile Reef, just off Goat Island, offers a simple, rewarding dive. We like the easy shore entry, gently sloping over sand and stone. You'll drop to about 18 metres, often finding good visibility on the sand flats, though the deeper areas can get a bit silty. It’s a great spot for an easy navigation dive, with plenty of koura tucked into crevices. Keep an eye out for schooling snapper and those ever-present rainbow trout. It’s a low-key site, perfect for a relaxed dive when the easterly winds stay under 8 knots.
Acacia Bay
Acacia Bay, tucked away in the Hauraki Gulf, makes for a straightforward dive, especially if you’re looking to get some practice in. We’ve found it’s a solid spot for honing buoyancy, given the silty patches if you stir things up. The underwater landscape is mostly rock wall, with a circular rock structure that divers built, which is a nice reference point when you’re navigating. Keep an eye out for freshwater crayfish nestled in the cracks, and you might even spot a rainbow or brown trout cruising by. It’s a good choice for newer divers or those simply wanting a relaxed dip to about 15 metres.
Acacia Bay
Acacia Bay, tucked away in the Hauraki Gulf, makes for a straightforward dive, especially if you’re looking to get some practice in. We’ve found it’s a solid spot for honing buoyancy, given the silty patches if you stir things up. The underwater landscape is mostly rock wall, with a circular rock structure that divers built, which is a nice reference point when you’re navigating. Keep an eye out for freshwater crayfish nestled in the cracks, and you might even spot a rainbow or brown trout cruising by. It’s a good choice for newer divers or those simply wanting a relaxed dip to about 15 metres.
Aldermens- Bishops Hat
Bishops Hat, out in the Aldermens, is a fantastic spot we always try to hit when the weather cooperates. It’s exposed to those easterlies and south-easterlies, so pick your day carefully, but when it’s good, it’s *really* good. We love dropping in here, particularly for the cave. It’s not a deep dive, peaking around 17 metres, but the way the light filters in through the entrance is just captivating. Inside the cave itself, we’ve often seen big Rig sheltering, and the walls are plastered with these colourful bristleworms that really catch your eye. Our favourite part has to be the outside wall though, where the kelp gives way to deeper water. This is where you might catch a flash of California Yellowtail or even a cruising Blue Shark if you’re lucky. We always keep an eye out for the cheeky New Zealand Draughtboard Sharks tucked into crevices. Visibility averages around 21 metres, which for New Zealand, feels like a gift. If you’re into a gentle drift, exploring some interesting rock formations, and don’t mind a bit of a boat ride, Bishops Hat is a winner. It’s a great dive for anyone comfortable with a bit of current and keen to see what the Hauraki Gulf really has to offer beyond the usual spots.
Aldermens- Bishops Hat
Bishops Hat, out in the Aldermens, is a fantastic spot we always try to hit when the weather cooperates. It’s exposed to those easterlies and south-easterlies, so pick your day carefully, but when it’s good, it’s *really* good. We love dropping in here, particularly for the cave. It’s not a deep dive, peaking around 17 metres, but the way the light filters in through the entrance is just captivating. Inside the cave itself, we’ve often seen big Rig sheltering, and the walls are plastered with these colourful bristleworms that really catch your eye. Our favourite part has to be the outside wall though, where the kelp gives way to deeper water. This is where you might catch a flash of California Yellowtail or even a cruising Blue Shark if you’re lucky. We always keep an eye out for the cheeky New Zealand Draughtboard Sharks tucked into crevices. Visibility averages around 21 metres, which for New Zealand, feels like a gift. If you’re into a gentle drift, exploring some interesting rock formations, and don’t mind a bit of a boat ride, Bishops Hat is a winner. It’s a great dive for anyone comfortable with a bit of current and keen to see what the Hauraki Gulf really has to offer beyond the usual spots.
Aldermens- Fish Factory
The Aldermens, and the Fish Factory site in particular, are a bit of a commitment to reach from Goat Island, but we think it’s absolutely worth the boat ride. Once you’re in, it’s a site that keeps your attention. You drop onto a wall that feels like it just keeps going, then a separate pinnacle rises up from the depths, forming a playground of ledges and overhangs. This is a site for divers who appreciate the subtle details and are comfortable with a bit of depth. We love drifting along the wall, keeping an eye out for the New Zealand Draughtboard Sharks tucked into crevices. The currents here can push you along nicely, but they also bring in the bigger stuff – we’ve seen Shortfin Makos here, though you have to be lucky and quick to spot them. Our favourite part is definitely the pinnacle; the pink maomao schooling there are just beautiful, and the way the light filters through them is something special. Keep an eye on your depth here, it’s easy to get distracted and go a bit deeper than planned as you explore.
Aldermens- Fish Factory
The Aldermens, and the Fish Factory site in particular, are a bit of a commitment to reach from Goat Island, but we think it’s absolutely worth the boat ride. Once you’re in, it’s a site that keeps your attention. You drop onto a wall that feels like it just keeps going, then a separate pinnacle rises up from the depths, forming a playground of ledges and overhangs. This is a site for divers who appreciate the subtle details and are comfortable with a bit of depth. We love drifting along the wall, keeping an eye out for the New Zealand Draughtboard Sharks tucked into crevices. The currents here can push you along nicely, but they also bring in the bigger stuff – we’ve seen Shortfin Makos here, though you have to be lucky and quick to spot them. Our favourite part is definitely the pinnacle; the pink maomao schooling there are just beautiful, and the way the light filters through them is something special. Keep an eye on your depth here, it’s easy to get distracted and go a bit deeper than planned as you explore.
Aldermens- HoneyComb
Aldermen’s Honeycomb isn't just a dive; it’s an exploration. We love how the site immediately draws you in, pulling you through those aptly named honeycomb-like tunnels. Sunlight filters through gaps in the rock, creating these incredible shafts of light, dancing on the walls. It’s an almost theatrical entrance to the deeper reef. Once you emerge, the southern wall drops away, a dark contrast to the brighter caves. This is where we’ve often found kingfish and kahawai cruising in the current – keep an eye out for them, they move fast. The wall itself is dotted with kina, and we’ve spotted some surprisingly large smooth skates settled on the sand at the base, looking almost prehistoric. Visibility here generally holds around 18 metres, which is enough to appreciate the scale of the rock. Our favourite moments are drifting along the wall, feeling that gentle push of the current, watching the larger fish move in and out of view. It's a site that rewards a slow, observant diver, offering a mix of tight, intimate spaces and expansive reef. Just remember to check the currents before you drop in; they can be a bit frisky along that southern stretch.
Aldermens- HoneyComb
Aldermen’s Honeycomb isn't just a dive; it’s an exploration. We love how the site immediately draws you in, pulling you through those aptly named honeycomb-like tunnels. Sunlight filters through gaps in the rock, creating these incredible shafts of light, dancing on the walls. It’s an almost theatrical entrance to the deeper reef. Once you emerge, the southern wall drops away, a dark contrast to the brighter caves. This is where we’ve often found kingfish and kahawai cruising in the current – keep an eye out for them, they move fast. The wall itself is dotted with kina, and we’ve spotted some surprisingly large smooth skates settled on the sand at the base, looking almost prehistoric. Visibility here generally holds around 18 metres, which is enough to appreciate the scale of the rock. Our favourite moments are drifting along the wall, feeling that gentle push of the current, watching the larger fish move in and out of view. It's a site that rewards a slow, observant diver, offering a mix of tight, intimate spaces and expansive reef. Just remember to check the currents before you drop in; they can be a bit frisky along that southern stretch.
Aldermens-Middle Middle
Middle Middle, tucked into the Alderman Islands, really stands out for us. It’s not about huge pelagics here, though a yellowtail or even a shortfin mako might cruise by if you’re lucky. What we love are those deep, grassy gullies. Drop down and you’re enveloped in a muted green, sunlight filtering through the kelp canopy above. It feels ancient, like a secret garden. Keep an eye out for crayfish tucked into the crevices, their antennae waving. We often spot banded morwong or the tiny, curious triplefins darting through the “grass,” which is actually a type of macroalgae. Visibility averages 14m, sometimes better, offering clear views into the topography. This site is ideal for photographers looking for something a bit different, and anyone who appreciates a tranquil, scenic dive rather than high-octane action. It’s a place to slow down and observe.
Aldermens-Middle Middle
Middle Middle, tucked into the Alderman Islands, really stands out for us. It’s not about huge pelagics here, though a yellowtail or even a shortfin mako might cruise by if you’re lucky. What we love are those deep, grassy gullies. Drop down and you’re enveloped in a muted green, sunlight filtering through the kelp canopy above. It feels ancient, like a secret garden. Keep an eye out for crayfish tucked into the crevices, their antennae waving. We often spot banded morwong or the tiny, curious triplefins darting through the “grass,” which is actually a type of macroalgae. Visibility averages 14m, sometimes better, offering clear views into the topography. This site is ideal for photographers looking for something a bit different, and anyone who appreciates a tranquil, scenic dive rather than high-octane action. It’s a place to slow down and observe.
Show all 97 dive sites in Goat Island & Hauraki Gulf
- Aldermens- Mooring Bay
- Aldermens- Mooring Bay
- Anemone Boulders
- Anemone Boulders
- Astrolabe Reef
- AUT Millennium Centre
- AUT Millennium Centre
- BIG BAY
- BIG BAY
- BLACK JACK REEF
- BLACK JACK REEF
- Black Rocks Lagoon
- Black Rocks Lagoon
- BRONZIE BAY - GMI
- BRONZIE BAY - GMI
- Champagne Rock
- Cherry Island, Taupo
- CORALIE BAY - GMI
- Devils Point
- Dolphin Underwater Club
- DOUBLE ISLAND
- Elephant Point
- Fairchild Reef
- Five Mile Bay
- Flat Rock
- GEM STONE BAY
- Get Wet Waikato
- GREEN ISLAND
- HMS Orpheus
- HOME BAY - GMI
- HUMBUG BAY
- Jones Bay
- Karewa
- Kinloch
- KORAPUKI
- Lake Rotoma
- Lazens Reef
- Lee Breakwater
- Little Ohinau
- MAHURANGI IS/ GOAT IS
- MAMONA BAY
- Matapaua Bay
- Matiatia Bay - Wharf
- Mayor Island - Northern tip
- Meola Reef
- Motiti Island - Taioma Wreck
- MV Rena
- Never Fail Rock - GMI
- North Shore Canoe Club
- OHINAU ISLAND
- Old man rock
- OPITO BAY
- Orca Bay
- OTAMA REEF
- PANCAKE ROCKS - MIDDLE ISLAND
- PEACH GROVE - GMI
- PINK BEACH
- Rarotonga Bay
- RED MERCS
- Rena (Wreck)
- ROCKY BAY - GMI
- SAIL ROCK - GMI
- Seafire wreck
- Seal Rock / Waikaranga
- SOUTH EAST CORNER
- STANLEY ISLAND
- Stanmore Bay Pool
- Sylvan Park
- Takatu Point
- Tawharanui
- THE BOOK CASE - GMI
- THE CATHEDRAL
- The Golf ball/ Car Park
- THE MAORI LADY
- The Pump House
- THE TWINS, Waikato
- Volkner Rocks Marine reserve
- Waitete Bay
- Wellington Reef
- West Point
- Whale Island
- Wharewaka Point
- White Island
- Wooded Island
- Wood Group Training Center
Goat Island & Hauraki Gulf Dive Centres
22 dive shops and operators in Goat Island & Hauraki Gulf
Ocean Wildlife in Goat Island & Hauraki Gulf
72 species recorded in Goat Island & Hauraki Gulf
Goat Island & Hauraki Gulf Daylight & Sunrise/Sunset
Sunrise and sunset times for Goat Island & Hauraki Gulf, calculated from coordinates
Today - Sunday 11 October
Sunrise
05:40
Sunset
18:29
Daylight
12h 50m
Golden Hour
17:55
First light (dawn) at 05:13 · Last light (dusk) at 18:56
Monthly Averages
| Month | Sunrise | Sunset | Daylight |
|---|---|---|---|
| Jan | 05:14 | 19:40 | 14h 26m |
| Feb | 05:48 | 19:16 | 13h 28m |
| Mar | 06:16 | 18:38 | 12h 23m |
| Apr | 06:43 | 17:53 | 11h 10m |
| May | 07:09 | 17:19 | 10h 10m |
| JunShortest | 07:29 | 17:07 | 9h 38m |
| Jul | 07:29 | 17:18 | 9h 50m |
| Aug | 07:03 | 17:43 | 10h 40m |
| Sep | 06:19 | 18:08 | 11h 49m |
| OctNow | 05:34 | 18:33 | 12h 59m |
| Nov | 05:00 | 19:05 | 14h 5m |
| DecLongest | 04:52 | 19:33 | 14h 41m |
Times are approximate local times based on longitude. Actual times may vary slightly depending on the exact timezone observed in Goat Island & Hauraki Gulf.
Where to Stay near Goat Island & Hauraki Gulf
Prices from Booking.com. We may earn a commission at no extra cost to you.
Marine Protected Areas near Goat Island & Hauraki Gulf
38 protected areas near Goat Island & Hauraki Gulf - please respect local regulations when diving
Whangarei Harbour Wildlife Refuge
Poor Knights Islands
Te Paepae o Aotea
Tuhua (Mayor Island)
Long Bay-Okura
Whanganui A Hei
Te Matuku
Cape Rodney-Okakari Point
Tawharanui
Motu Manawa-Pollen Island
Whangarei Harbour
Mokohinau Islands
Showing 12 largest of 38
Getting to Goat Island & Hauraki Gulf
Manurewa
Auckland
Wellington
Plan & book
Ways to dive Goat Island & Hauraki Gulf, from day trips to liveaboards.
Day trips & courses
via GetYourGuideGuided dives, courses and snorkel trips with instant booking.
Find dive trips in Goat Island & Hauraki GulfPlaces to stay
via Booking.comHotels and dive resorts near Goat Island & Hauraki Gulf.
Search stays in Goat Island & Hauraki GulfDive insurance
Most travel insurance excludes or limits scuba. Check what you need before you go.
Dive insurance explainedPartner links: we may earn a commission if you book, at no extra cost to you. How we make money